Before you can upload your PDF to the Help for Hokies site, you need to Download your second project from Google Drive as a PDF and Register on the Help for Hokies site to create a personal login.
To upload your file, follow these steps:
- Use the Log In link in the upper left toolbar to log into the Help for Hokies site, using the username and password you created when you registered.
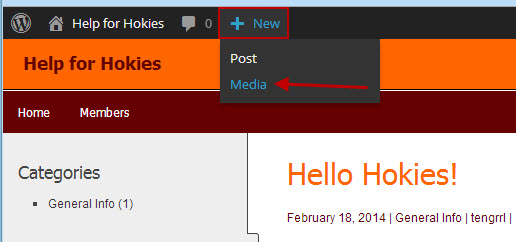
- Click the + New link in the upper toolbar, marked with the red rectangle in the screenshot below:
 (Note: If you cannot see the details in the images, just click on them for a larger version of the screenshot.)
 - Choose the Media command from the submenu, marked with the red arrow in the screenshot above.
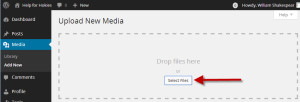
- Click the Select Files button on the page that appears (marked with the red arrow in the screenshot below), and navigate to the PDF you want to upload on your hard drive.
- Wait several seconds while the file uploads and is processed. The file will be listed on the page under the Select File box, marked with the red arrow in the screenshot below:
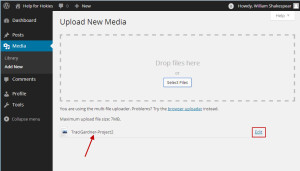
- Click on the Edit link on the right, marked by the red rectangle in the image above.
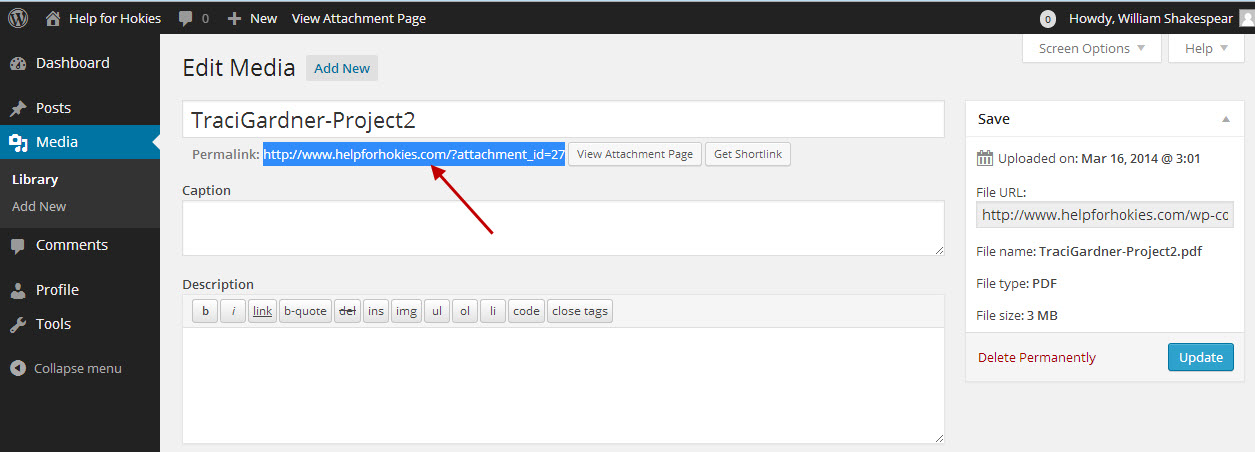
- On the media page for the PDF you have uploaded, copy the permalink, marked by the red arrow in the image below. This is the link you will use to post your PDF in a blog post on the site.


Tips
- If you cannot see the details in the images posted above, just click on them for a larger version of the screenshot.
- If something goes wrong and you need to copy the permalink for your PDF again, log into the Help for Hokies site, and use the Media –> Library link in the left sidebar. You can use the Edit link in the list that appears to get back to the page that shows the permalink.